Sponsored by Garmin
Fishfinders have come a long way since their first inception. What was once a small, pixilated silhouette of a fish on a black and white background has now given way to the television-sized units so detailed they can pick up even the smallest pebbles on the lake bottom.
With complexity, however, comes confusion, and modern fish finders provide no shortage of it. Thankfully, we here at Fish’n Canada have made a living deciphering these colourful screens and are here to offer our assistance.
Starting with Traditional CHIRP sonar, here is everything you need to know to find fish on modern sonar units!
How CHIRP Works
CHIRP, and nearly all other modern sonar technologies, use the same tried and true system for detecting what is going on beneath the boat.
As Angelo mentioned in the Tools of the Trade video above, fishfinders work by transmitting a signal down through the water, via a transducer, and when that signal hits an object that has more density than the surrounding water (like a fish, fallen tree, weed bed, and, of course, bottom), it bounces back, gets processed, and is displayed as an image on the unit’s screen. The clarity and detail in which this signal is displayed is largely dependant on the model of fishfinder you are running – technology that continues to improve year after year.

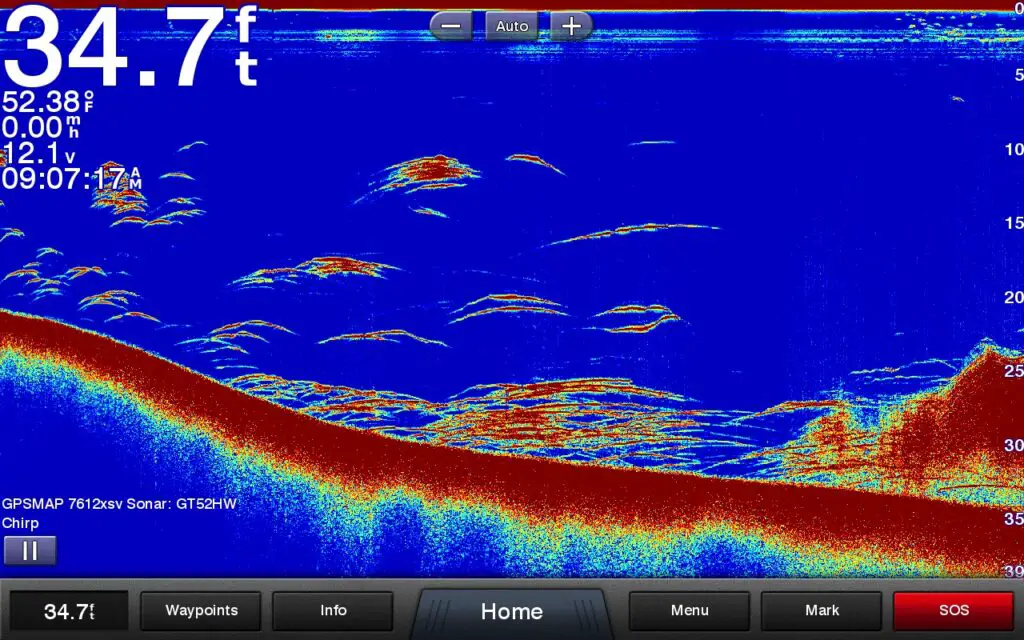
Finding Fish
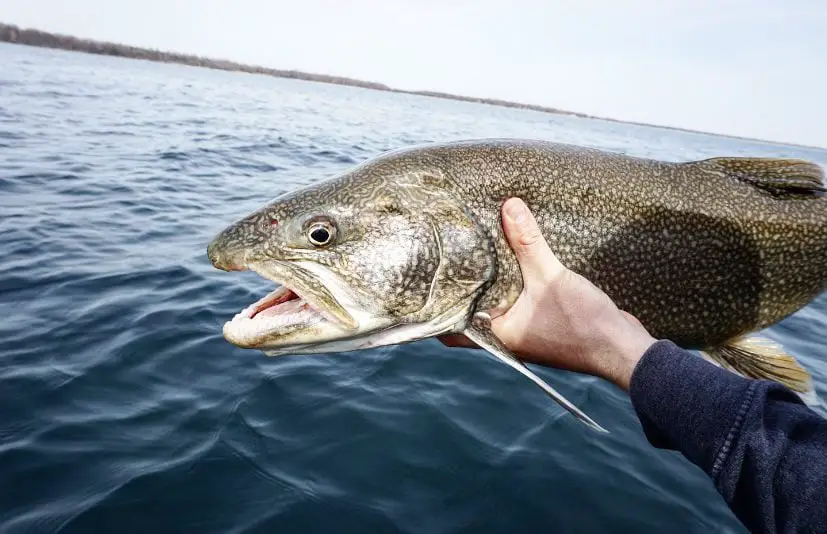
Fish are the first thing everyone wants to see when they turn on their fishfinder. After all, they are called fishfinders. However, as mentioned in the intro, sonars have come a long way from displaying tiny, cartoon fish on their screens and the not-so-fishy-looking lines shown on modern units can tell you a lot more about the fish beneath your boat than that black fish shape ever could. Here are a few key things to look for when scanning the lake for fish.
What Fish Look Like on CHIRP Sonar
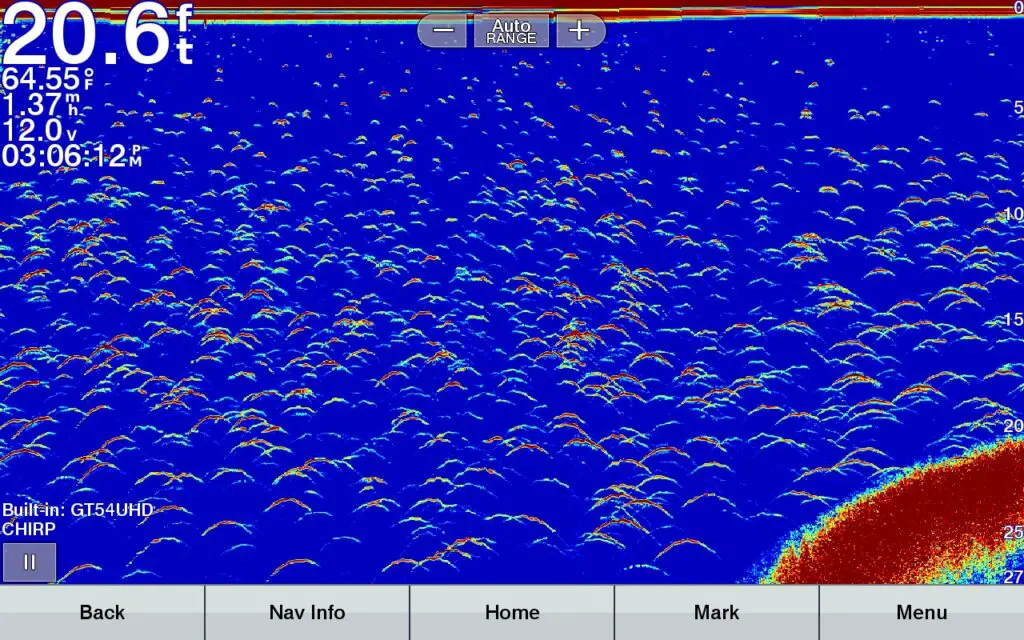
Traditional CHIRP is likely the view that many of you are most familiar with. Coming standard on all Garmin units, CHIRP provides a simple, yet useful, look at what is going on beneath your boat. Though some may be tempted to turn on their FishID and have their classic fish icon simplify things even further, there is a lot you can miss out on if you are not taking the time to understand what those lines on your screen really mean.
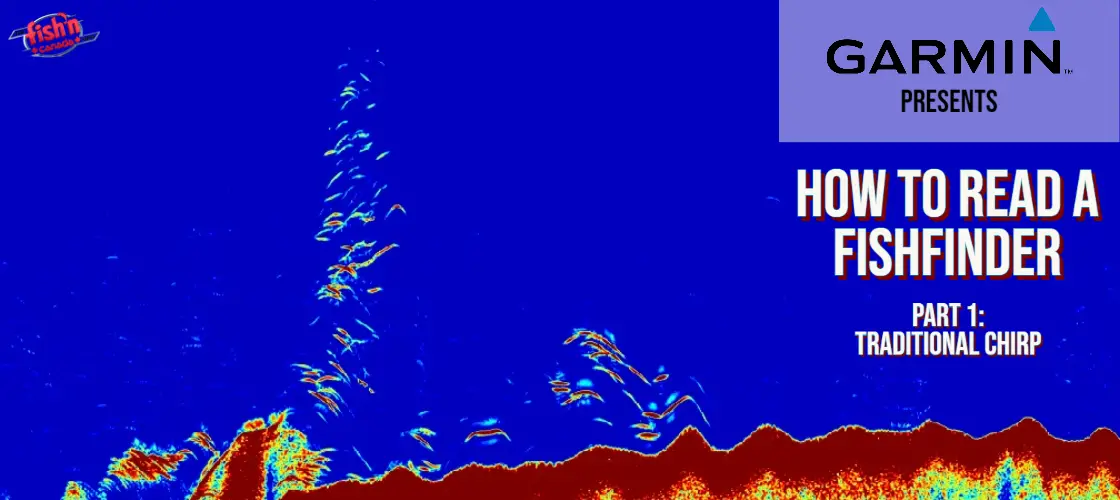
The screenshot above shows, in perhaps its purest form, what fish look like on modern sonars. The hook-shapes that you see in the photo are the result of movement, from either the fish or your boat. This movement captures a thin line when the fish first enters the cone of the transducer, a thick bar when the boat is directly on top of the fish, followed by another thin section when the fish is leaving the cone. For this same reason, ice anglers, often see long, thick bands on their screen, as fish are not actively moving in and out of the cone.
How to Determine Fish Size Using CHIRP Sonar
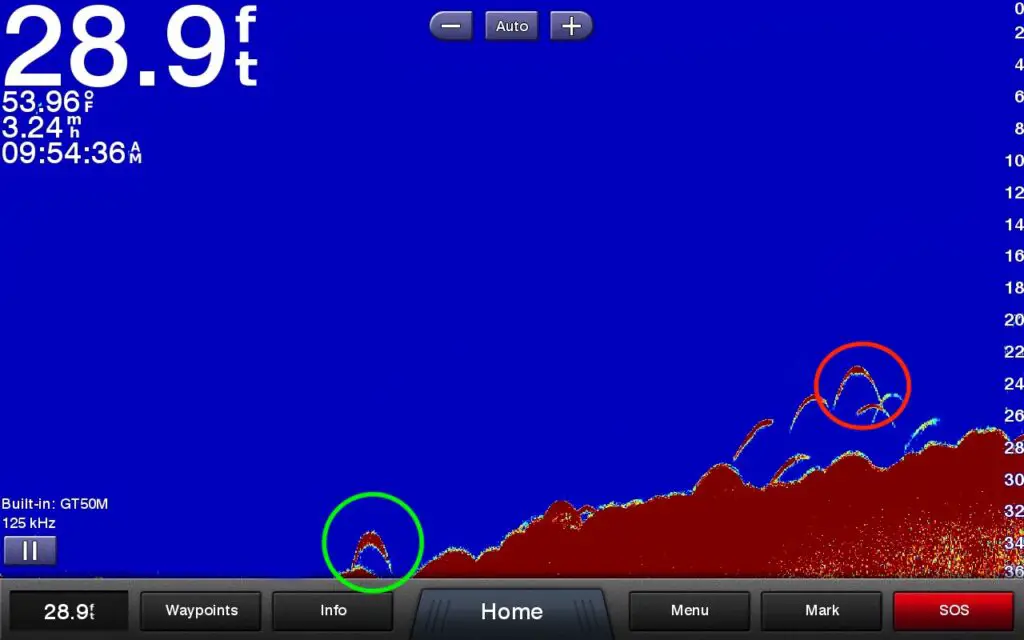
In addition to these shapes being a tell-tale sign of fish, their size and thickness can also help tell you how big the fish beneath your boat truly are.
Though misleading to many, large marks do not necessarily mean large fish – thick marks do. As discussed above, the shape of fish displayed by modern sonar units is created by a fish entering and leaving the cone of the unit’s transducer. This means that the length of the “hook’s” middle section is determined by how long the fish stayed under your boat, not necessarily how large the fish was.
For this reason, as well as it being over 10 feet deeper than the mark in red, the fish pictured above in the green circle is likely bigger than that circled in red, as the transducer’s beam was forced to travel through a larger surface area before reaching the other side. This is apparent not only in the thickness of the hook’s center but also in the denseness of its ends.
As seen in the bottom right of this screenshot, dense objects, such as a rocky lake-bottom, are displayed in a deep red, while less dense objects are displayed in greenish-yellow. In comparing the two fish circled on the screen, that circled in green has thicker, red-coloured ends, while other fish in the area do not. This suggests that the fish circled in green was significantly denser at its first and last contact point with the transducer, implying that the fish had a much larger head and tail.
Finding Bait

Next to fish, bait is one of the most encouraging things you can see on a fishfinder. In fact, a good bait school can often be more reliable than those big hook marks most anglers are looking for, as although a bait school might look like it is alone, big predators are never far behind. But what do these schools look like on modern sonars? And what does their location tell us about the school we are looking at? Let’s take a look.
What Bait Looks Like on CHIRP Sonar
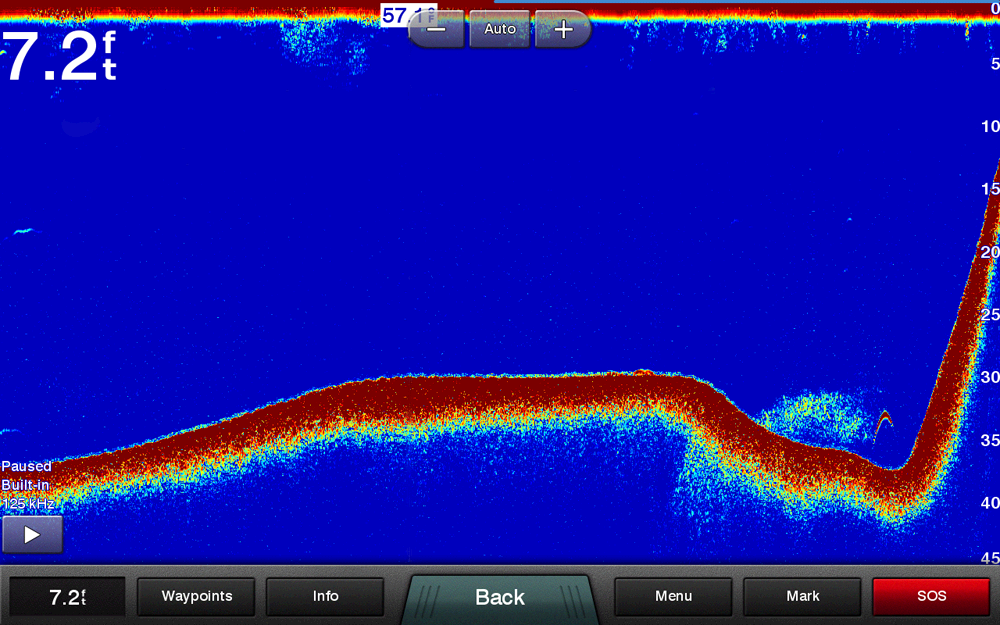
As mentioned in the section above, the hook-shape that fish are displayed as is due to their movement under the boat and the shape of their body as it tapers out at the head and the tail. This technology is excellent at showing defined shapes for larger items in the water, however, for smaller objects, things are not quite as clear.
Since baitfish are often just a few inches in size, their small bodies provide just a blip of interference on the sonar’s beam and, therefore, show up as small dots or lines rather than defined hooks. Thankfully for anglers looking to identify them, these fish are rarely alone, making fuzzy bundles of dots the target that bait-seeking anglers are looking for.
This shape can be seen clearly in the photo above, where a defined hook-shaped fish lurks just behind a school of dot-like baitfish.
Finding Structure
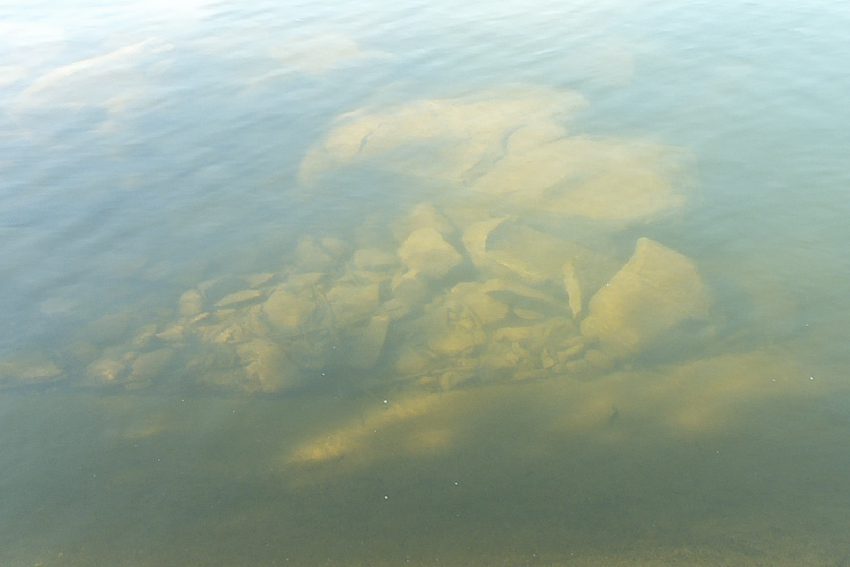
Locating structure is essential to locating fish, and although many may view this as more of a job for the mapping feature of their sonar units, traditional CHIRP can tell you a lot about the composition of the area beneath your boat.
Using Colour to Determine Bottom Composition
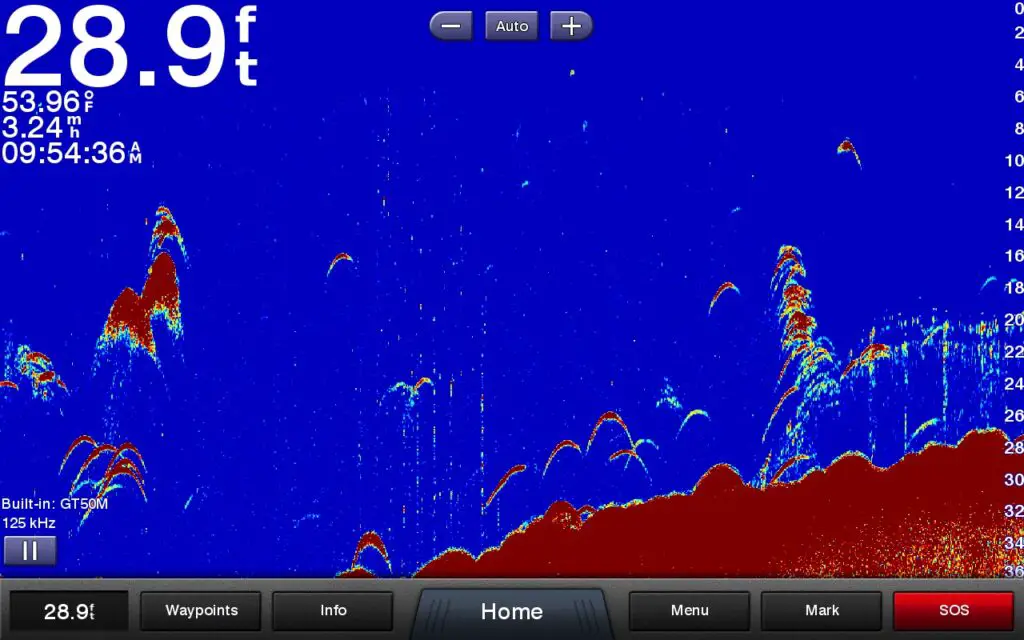
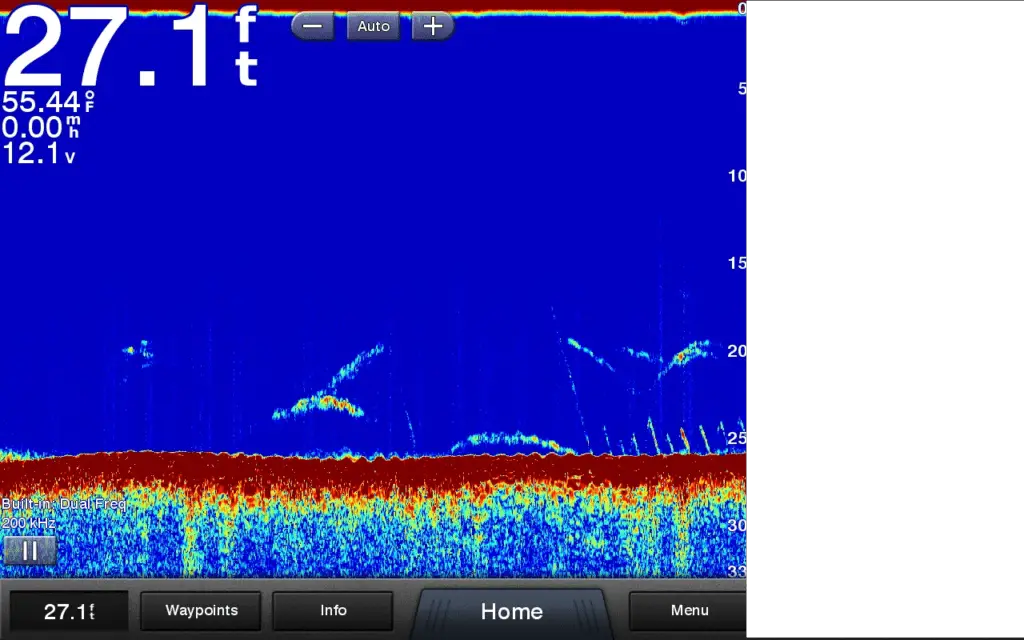
As explained by Ang at the start of the article, fishfinders produce their images by transmitting a beam towards the bottom, displaying everything that interferes with it along the way on the screen in your boat. Since denser objects create more interference, these features show up darker on the screen than those that are a bit softer. This makes CHIRP an excellent tool for establishing the bottom composition in the areas we are fishing.
As seen in the images above, the left screenshot displays a uniformly dark-red bottom, while that on the right displays a fuzzy red, green, and yellow. This suggests that bottom area on the left is made up of hard rock, as it allowed the beam no room to penetrate, while that on the right is likely made up of a softer material that allows the beam to break through at certain points.
While these may seem like subtle, minute details, these areas were just feet apart and can make all the difference when looking for fish that hold to specific structure, like rock-hugging smallmouth or silt-sitting burbot.
Conclusion
We hope that helped clear up some of the confusion surrounding traditional CHIRP sonar. Stay tuned for part 2 where we will dive into all things Side Imaging!


3 Responses
Great article. Hard to find good detailed info on reading a fish finder. Thanks
Hey Brian, stay tuned as we will be posting subsequent articles in the near future (Side-Vu is next).
Bravo, Bravo, finally got something we can see, read and spend some time analyzing without listening to the babbling for hours and virtually take nothing away except the sales pitch to Spotify or something else.
Try to remember your roots..